W0HC’s Backyard BBQ Ribs

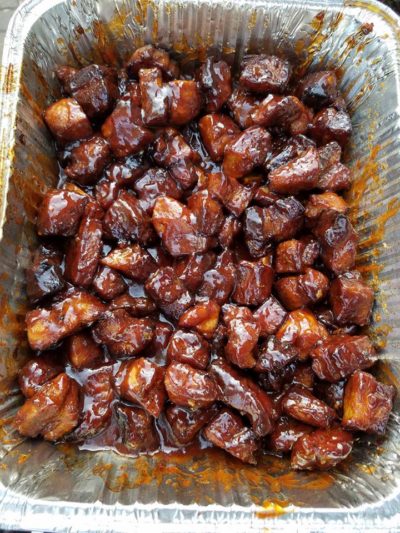
I do love some good Baby Back Ribs. And these are pretty good. This recipe is based on one from Steven Raichlen’s Basic BBQ Rub.

To start off, you need a good rub. I don’t sauce these ribs, so the dry rub is critical. You can always add sauce when you eat them if you so desire.
Backyard BBQ Rub
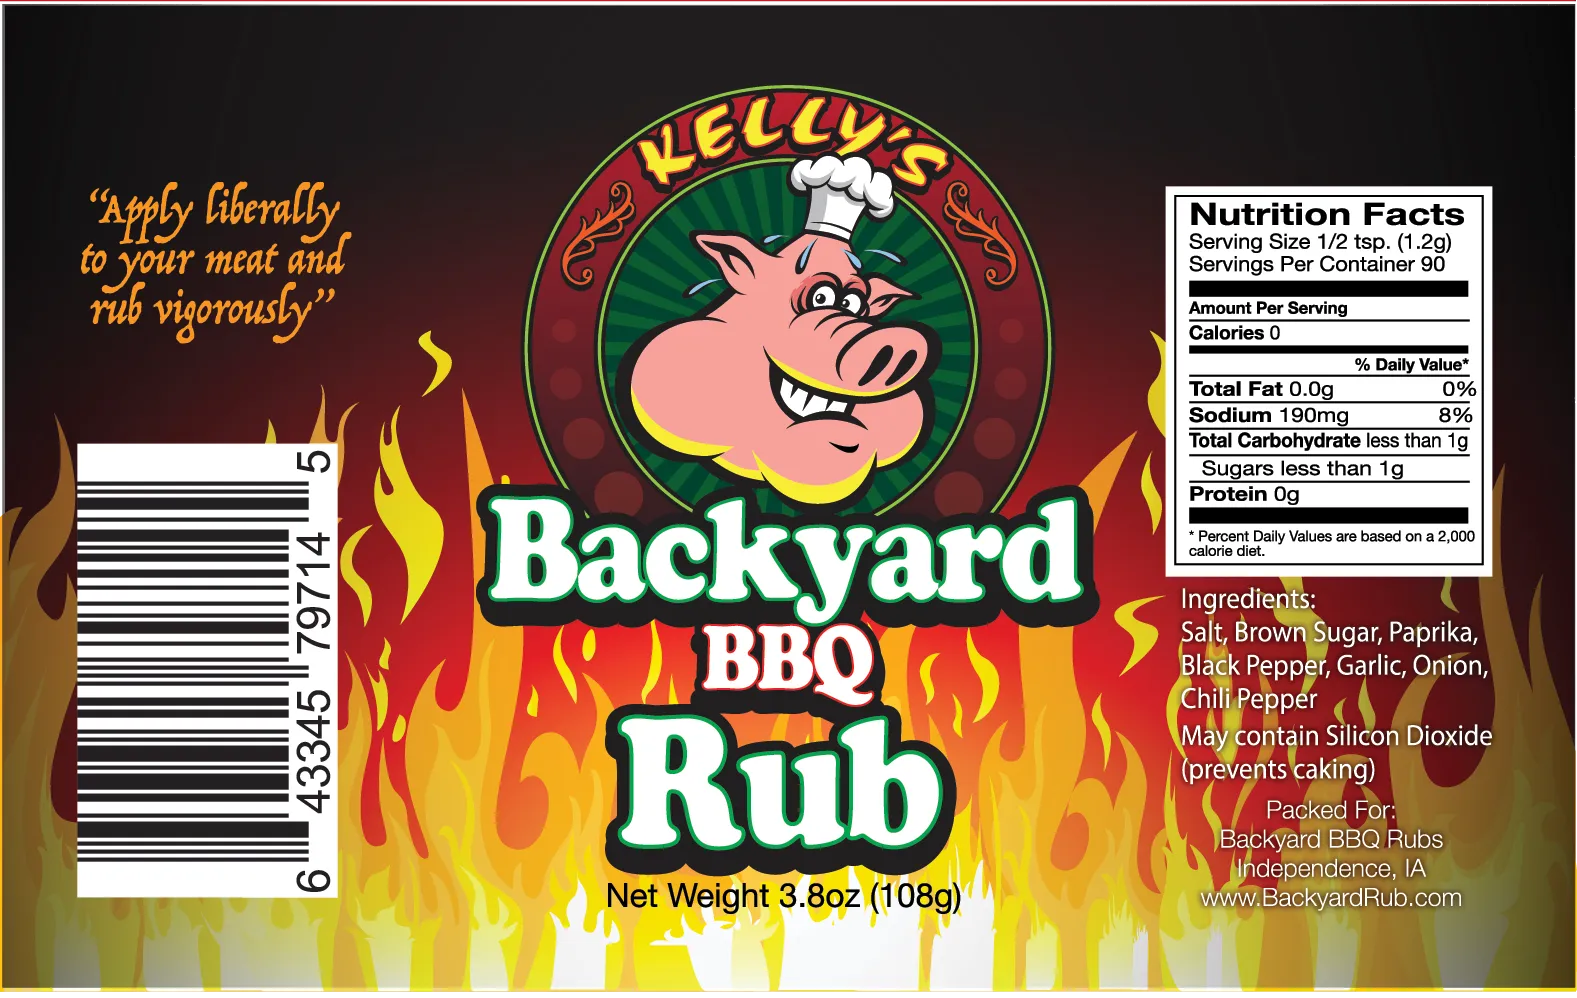
Here is my modified recipe:

Ingredients

1/4 cup coarse salt (sea or kosher)
1/4 cup dark brown sugar
1/4 cup sweet paprika
3 tablespoons black pepper
1 tablespoon garlic flakes
1 tablespoon onion flakes
1/8 teaspoon cayenne pepper (more if you like some heat)
1 teaspoon silicon dioxide to prevent caking (optional)

Instructions

Step 1: Combine the ingredients in the bowl and mix, breaking up any lumps in the brown sugar with your fingers. (Your fingers work better than a whisk or wooden spoon.)

Step 2: If not using the rub right away, store it in a sealed jar away from heat and light.

Now you’re ready for a nice rack (or two) of baby back ribs. I buy mine in two-packs at Sam’s Club and have excellent luck with them.

Cooking Instructions

This is based on the 2-2-1 method: 2 hours of smoke, 2 hours wrapped, and 1 hour on the grill.

Step 1: Remove the thin, papery membrane from the back of each rack of ribs.

Step 2: Generously sprinkle rub on both sides of the ribs, rubbing the seasonings onto the meat

Step 3: Place the racks of ribs in the smoker bone side down at 225-250°F (I usually run around 235°F). Smoke the ribs until for 2 hours or a bit more.

Step 4: Wrap ribs in heavy duty foil and add about 1/4 cup of apple cider. Put them back in the smoker for another 2 hours.

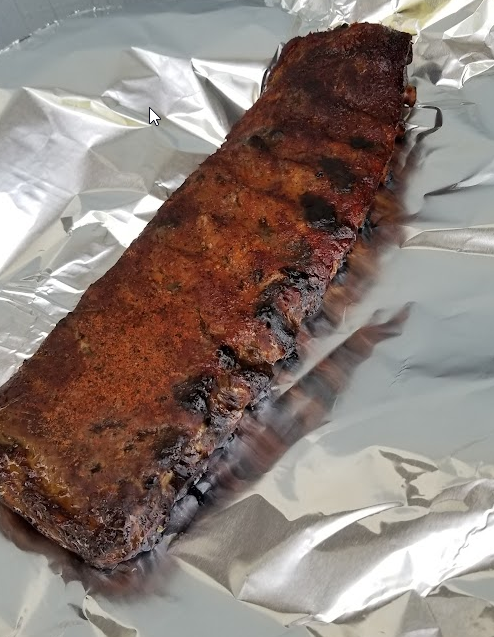
Step 5: Remove the ribs from the foil and put them on a hot grill and cook until they reach your desired doneness. When the ribs are done, the meat will have shrunk back from the ends of the bones and will be tender enough to pull apart with your fingers. The exterior will be dark, but not burned. This step usually only takes me 10-20 minutes over medium heat.

Step 6: Transfer the racks of ribs to a large platter or cutting board and cut the racks in half or into 2 or 3 bone portions. Serve the ribs with your favorite Barbecue Sauce on the side.

Step 7: Enjoy!

Baby Back Ribs

Pyramid PS-12 Repair

I’ve had this Pyramid PS-12 power supply for going on 35 years now. It recently stopped turning on, as in the switch was physically stuck in the off position.

Searching the web I found little information on a replacement, other than a single YouTube video where a guy mentioned getting a replacement switch at Home Depot.

The switch snaps into the chassis, so removing it is pretty straightforward. You do need to de-solder the power leads to the switch.

I measured the opening and came up with approximately 14mm x 29mm. I looked at the various switches at Home Depot’s website and found the GSW-42 appeared to be a close match. This is a lighted switch, so there’s an extra neutral lead that you can connect if you want the switch to light up. I didn’t bother with it and left it unconnected.

It’s just a bit too wide to fit the opening, so grab your files and go to town enlarging the hole. It didn’t take a lot.

Snap the new switch in, re-solder the leads to the switch, and you’re good to go!

Here’s a picture of the switch from Home Depot

Hopefully I’m good for another 35 years!

Blitzortung

I’m a weather nerd. I like all things weather related. Around 10 years ago I ran across an interesting project to track lightning strikes around the world. Blitzortung.

Blitzortung is a community-based lighting detection network that uses Time of Arrival (TOA) and Time of Group Arrival methods to locate lightning strikes. It relies on a network of distributed, low-cost receiver stations, run and assembled by volunteers, to detect VLF radio waves emitted by lightning. By measuring the time it takes for these signals to arrive at different stations, the system can triangulate the strikes location.

I won’t go into great detail here on how it works, as you can find that information on the Blitzortung project pages. What I will show here is a little about my receiving station.

My station is a “System Red” PCB 10.4 detector. I purchased it as a kit and assembled it. I had to build my own antennas. You can find out a ton more information about the receiver and how it all works at the System Red link.

I chose to use Ferrite Rod antennas for my application. I wound the antenna on ferrite rods, shoved them inside a piece of 1/2″ PEX tubing, then wrapped them in copper tape with a 2mm slit to provide shielding. That all get put into a 3/4″ PVC pipe to weather proof the elements. There are two of these antennas, one is mounted vertically and one horizontally.

One of the ferrite antenna elements.
Antenna after insertion in PEX tubing and wrapping it with the copper shielding tape.
The completed antenna and the outdoor amplifier board.

I attached the completed antenna to my privacy fence in the backyard. Shielded CAT5 Ethernet cable connects the amplifier to the main controller. I also mounted the necessary GPS antenna outdoors.

Inside is the Main Controller, mounted to a wall in my basement.

The “System Red” controller.

It all works surprisingly well, though it does suffer from some interference. The spot on the fence seems to be one of the quieter spots. Mounting it on the side of the house was a lot worse interference wise.

This isn’t a simple build it and it will work setup. You have to be willing to tweak antennas and locations to find the “best” spot for the antennas.

System Red is long since discontinued, but is still supported by the network, and was replaced by System Blue, but I believe these are sold out.

Blitzortung is run completely by hobbyists, so their resources are a bit limited. In addition to making and selling the kits they also have to operate the servers that aggregate the data and calculate the lightning locations. They make the data freely available at www.lightningmaps.org. If you use their data please consider a donation to keep things running.

The Joys of Amateur Radio: How This Hobby Can Enrich Your Life

Are you looking for a new hobby that can bring you excitement, challenge, and a sense of community? Look no further than amateur radio! Amateur radio, also known as ham radio, is a fun and rewarding hobby that can provide endless opportunities for communication, learning, and adventure.

As an amateur radio operator, you’ll have the chance to communicate with people from all over the world, sharing stories, learning about different cultures, and making new friends. You’ll be able to participate in nets, which are regular meetings of amateur radio operators, and take part in contests and other events. Plus, you’ll be able to use your skills to help out in emergency situations, such as natural disasters or public service events.

But amateur radio is more than just communication – it’s also a great way to learn about science, technology, engineering, and math (STEM). You’ll be able to learn about the physics of radio waves, the electronics of transmitters and receivers, and the software used in modern radio systems. And with the rise of digital communications, you’ll be able to experiment with new technologies like satellites, software-defined radios, and more.

In addition to the technical aspects of amateur radio, there’s also a strong social aspect to the hobby. You’ll be able to connect with other amateur radio operators in your local community or around the world, sharing experiences, swapping stories, and learning from each other. Many amateur radio clubs and organizations host events, field days, and other activities that bring people together and foster a sense of camaraderie.

So why not give amateur radio a try? It’s a hobby that can be enjoyed by people of all ages and skill levels, from beginners to experts. With the right equipment and some basic knowledge, you can start enjoying the joys of amateur radio today. Plus, many organizations offer training and resources to help you get started.

In conclusion, amateur radio is a wonderful hobby that can provide endless opportunities for communication, learning, and adventure. Whether you’re interested in making new friends, expanding your knowledge of science and technology, or just having fun, amateur radio has something to offer everyone. So why wait? Join the thousands of amateur radio operators around the world and start enjoying this exciting hobby today!

(This post was created using AI)

Rediscovering the Magic of Ham Radio

Hello fellow ham radio enthusiasts!

It’s been a while since I’ve taken the time to sit down and write about my passion for ham radio. Life has a way of getting in the way, and over the past year, I found myself taking a break from the hobby. However, I am happy to say that I am now eager to get back on the airwaves and rediscover the magic of ham radio.

For those who may not know, ham radio is a hobby that allows radio enthusiasts to communicate with others around the world using voice, digital modes, and even morse code. Whether you are interested in making new contacts, participating in contests, or simply chatting with friends, ham radio has something for everyone.

Over the past year, I have missed the thrill of making new contacts, the excitement of participating in contests, and the camaraderie that comes with being part of the ham radio community. I am now eager to jump back in and see what’s new in the world of ham radio.

So, if you hear me on the airwaves, don’t be afraid to say hello. I’ a’m looking forward to making new contacts, chatting with old friends, and rediscovering the magic of ham radio.

(I've also been too lazy to post here, so I asked ChatGPT to write this post).

73,

W0HC

Building a Wi-Fi NTP Clock

I had been wanting a nice digital UTC clock for my hamshack. In particular one that could set itself to an NTP server over the internet to maintain precise time. But I was having trouble finding a WiFi NTP clock at a price I was willing to pay. Most of the ones I was finding online were $200 or more. So what’s a ham to do? Build your own!

After a lot of searching for what I wanted, I ran across this project (see notes at end of post) over at Adafruit, and seemed like it just might fit the bill. And it did.

I used a Raspberry Pi Zero W as the brains, and the Adafruit 1.2″ 4-Digit 7-Segment Display w/I2C Backpack for the display. I followed the rest of the tutorial and it worked great.

After trying it for some time I was happy with it, and found a Polycase enclosure that was almost the right size. At least for the 7-segment display itself. With it soldered to the backpack it was way too tall. So why not run it remotely from the backpack board? Using some jumper wires I did just that, and with only some minor Dremeling to the enclosure to make it fit perfectly.

Wifi NTP clock internal image

I used some red plexiglass on the front and it looks great in the shack. And it’s a bonus that the time is always correct. Just be sure that when you configure the Pi you set it to use UTC time.

Finished WiFi NTP Clock
The finished LED Wifi NTP Clock

All together I spent around $60 to build this clock.

NOTES:
Before pip3 command can be run, you need to do this:
sudo apt-get install python3-pip
You also need to run the pip3 commands as sudo.

It appears the github content for this project has gone 404, so you may have to create the python code files yourself.

You also will have to set the program to run as a service and should consider ways to extend the life of the SD card by reducing writes.

French Toast Alerts

For several years I’ve been posting my “French Toast Alerts” on my Facebook timeline. But where did the idea come from?

Well, for starters, working at a grocery store in high school I noticed that any time snow was predicted, certain items seemed to become very fast sellers. Namely, bread, milk, and eggs. What the heck is going on? Are people planning to make French Toast if they get stuck at home??

Fast forward a couple decades and I ran across a Twitter account that was posting “French Toast Alerts”, so I asked if I could steal the idea, he referred me to the original source of these, Universal Hub in Boston. so I reached out to them to see if they minded. They said by all means, have fun with the idea. And so I have had fun with it.

And now when winter weather threatens Eastern Iowa I will often post this nonsense on my Facebook. Sometime I forget, or don’t even realize snow is coming, and stupidly enough someone will reach out to me to see if a French Toast Alert is warranted. So I guess I’ll keep posting them.

10m Calling Frequencies

I found this list on the Heartland 10mtr and 6mtr and 12mtr group AM/FM/SSB/digital modes Facebook group. It looked like something I could use again so I’m posting it here.

28.025 CW Rare DX & DXpeditions Frequently Operate Here — Split
28070.15 PSK-31 (offset -115 for USB)
28.080 RTTY Rare DX & DXpeditions Frequently Operate Here — Split
28.1010 10/10 Intl CW Calling Frequency
28120.150 — PSK31
28.120-28.300 Beacons
28.380 10/10 SSB Intl Calling Frequency
28.425 10/10 SSB Intl Calling Frequency
28.495 SSB Rare DX & DXpeditions Frequently Operate Here — Split
28.600 Old General Callin Frequency – Still used by Old Timers
28.675~28.685 SSTV Operating Frequency — IARU Region 1
28.680 SSTV Operations USA/Canada
28.825 10-10 Backskatter Net – Paper Chasers Net
28.885 6M DX Liaison Frequency — Listen here for 6 Meter DX opening announcements and discussions.
28.945 FAX Operating Frequency
29.000-29.200 AM Operations
29.300-29.510 Satellite Downlinks
29.520-29.580 Repeater Inputs
29.600 FM Simplex – Calling Frequency
29.620-29.680 Repeater Outputs

Weather

I’ve always been a self described “Weather Geek”. In fact, weather spotting was one of the reasons I became interested in amateur radio as a teenager.

I’ve been a National Weather Service trained spotter since 1995.

I’ve been uploading data to Weather Underground since 2006. The first station was located on top of Independence Fire, and was a Peet Bros Ultimeter 2100. Sadly, it didn’t last long due to the computer it was connected to being destroyed by lightning. The a radio maintenance company claimed to have found the anemometer in pieces on the rooftop. It was fine a few days before that so I’m not sure what happened.

Later I obtained a Davis Instruments Vantage Pro 2 (wired version), which is now residing at the W0HC QTH. The anemometer is installed at 30′ on my tower, and the rain gauge and thermometer are at about 10′.

The data is captured via USB by a Raspberry Pi running WeeWx. From there it is uploaded to Weather Underground and APRS.

Pork Belly Burnt Ends

Our local Fareway grocery store had ordered some pork belly for a customer, and had some left over, so I decided to try smoking some. My original plan was to make bacon, but I got up one day and the weather was perfect to sit outside smoking meat, and I hadn’t cured my pork belly (which takes 7-10 days) so I decided on Pork Belly Burnt Ends.

I started with 1/2 of a pork belly (about 7lbs) with the skin removed. There’s a lot of fat on pork belly, and you want to leave a fair amount, but trim away some excess. I probably had over a pound of fat that I removed.

  • Trim excess fat
  • cut the meat into 1 1/2 to 2 inch cubes.
  •  apply Extra Virgin Olive Oil (enough to coat the meat) and your favorite dry rub (if you don’t have a favorite I recommend making up some Raichlen’s Rub #2) – Be generous (use about 1 cup of dry rub for 5 lbs of meat).
  • Smoke for three hours at 225-250 degrees or until you like the color of the meat. A nice bark will form starting around the three hour mark.
  • Next, add the cubes to a pan (we like a heat-proof disposable pan). Into the pan add the braising liquid. We use BBQ sauce to really add that extra flavor (about 1 cup), 3-4 tablespoons of butter, which adds richness and acts as a fatty binding agent for bringing the sauce and honey together, and then 2 tablespoons of honey (or agave) to bring a stickiness and sweet characteristic. Then mix them all together
  • Then cover and braise in smoker for another 60 – 90 minutes. You will find that the liquid braises at or near a boil and that the fat renders down in the burnt ends keeping the pan moist.  Again, you have added additional fat in the butter, the honey as a binder and the sauce for flavor to really render out the fat that is in the pork belly.
  • Finally, remove the foil pan cover and cook for another 15 minutes to let the heat tack up that sauce,
Sauce:
  • 1 cup BBQ sauce
  • 3 tablespoons unsalted butter
  • 2 tablespoon honey

Notes:

I smoked these for 3.5 hours at 235°F using Apple wood in my Masterbuilt electric smoker. I then followed that up on the Weber Kettle charcoal grill using Kingsford charcoal with some apple wood chips thrown on top over indirect heat for 30-40 minutes to get a better bark on them. I then sauced them up and braised them on the Weber gas grill (mainly because I could control the temperature better than on the charcoal grill) for 45 minutes at 250° before removing the cover to tack them up.

This recipe is based on one I found here: http://www.vindulge.com/2017/05/smoked-pork-belly-burnt-ends-recipe-and-video/